KTM 990 Part 10
- Chasbo
- Apr 15, 2020
- 4 min read
Not a lot to do this week since I am waiting on tools and parts, but I still managed to accomplish a little on my build. First, I had to finish the cleaning of the swingarm and all the parts that came off. Then I had to get the tire mounted and balanced. That would put me in a good place for the next step later this week. There was a ton of grafted on dirt and grease on the back end of the bike. Most of it wasn't even visible until I removed the rear wheel. No problem, I have turned into a cleaning fiend. It can be frustrating. Every time I turn around, I find a bunch of dirt somewhere I would swear I have cleaned already.
The last time I worked on the bike, I got the worst of the grime off the swingarm. Now it was time to finish the job. After a bit of scrubbing with a green Scotch Brite pad and 409 (my favorite combo), I found a spot where the right side axle adapter slides that had a huge gouge on it. So out came the Dremel and a sanding wheel to fix it.


That'll work. I won't cut myself on that now. Next, I used a small wire wheel on the Dremel to clean out some hard to get grease and dirt...

Then it was back to the green scrubber and I went after the rest of the dirt. It ain't the prettiest, but it is clean enough for me...

The next thing on my list was to drill a couple of drain holes in the bottom of the swingarm to let out and water that gets in there, perhaps from some maniac cleaning a bike 27 times in a row...
First, a punch to make it easier for the drill bit to bite.

Then, since there isn't a lot of room for my drill, the Dremel steps back in to do the job

It really isn't powerful enough to do the job right, but I made it work...

Those are horrible pictures, but after each was done, a bunch of dirty water poured out....good enough. Next up was my head light unit. I pulled it apart last time and cleaned it really well, so I took the time to finish the job and got it back together. I think it looks alright...

Then I got the rear brake sharkfin and the rear axle all cleaned up and shiny-ish.

That was it for the day. I decided to put things away and start up again the next day.
After breakfast the next day, it was time to get to that rear wheel and brake. The tube I pulled out of the old tire was in really good shape, so I am reusing that for sure. That will leave me my new tube as a spare. So, after I got the tube into the new tire, I threw it out into the sunshine to warm it up and make it easier to get onto the wheel.

While it was warming up, I got all the tools I needed laid out and the compressor charged up and ready to go.

Once it was warmed up, I got some WD40 onto the tire bead...

Then out came my little Tusk valve stem guide

Once through, I got a nut onto the valve stem to keep it locked on. Then, using my 12 inch irons, I spooned the first tire bead onto the rim. It went so fast and easy that I could almost call it fun.

Then out came the Motion Pro bead lock after lubing the other sides bead up and with the same irons, I finished the job. Seriously, it was so easy, I am going to start looking forward to fixing flats and changing tires from now on.


Then I aired the tire up to 35 psi to allow the bead to seat. The WD-40 works so well, it seated at about 15 psi.

That's a beefy tire, I am looking forward to trying it out. I dropped down from a 150 to a 140 size. I don't thing it will make too much of a difference in the long run.

After cleaning the lube off of the tire and rim, it was onto balancing it.

While I was doing that, Mr. Postman stopped by with a delivery....

That's awesome news, I now have the tools necessary to turn the engine over by hand as well as some torx wrenches to pull off the upper triple clamp so I can relube the steering bearings. Nice....
Then I applied antiseize to my axle adjusters and reinstalled those


After I balanced the rear wheel, I started on the rear brake caliper. Lots of cleaning to do there...


So, with liberal use of my brushes, brake cleaner and isopropyl, I managed to get the worst of it off.
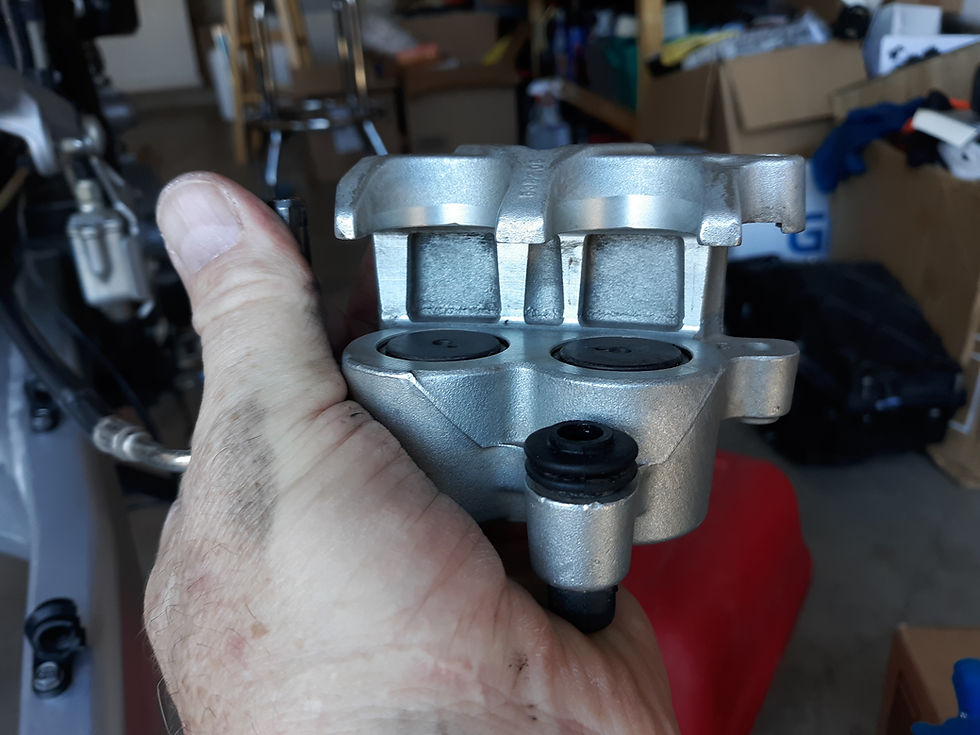


Then I went ahead and pressed the pistons back into the caliper body to make reassembly easier.

All cleaned and prepped, I put it all back into a box to wait until tomorrow to finish the rear end. I made sure I cleaned the ABS sensor all up as well.

It should be a blast to put it all back together tomorrow. Once that is done, I can start in on removing the chain and front sprocket so that I can clean up behind it as well as clean out the oil jet which is situated behind everything. That was a good bit of work considering, so I will call today a success and be ready o move onto the next step tomorrow. My new grips, chain tool, safety wire and rear brake pads showed up along with a big bottle of Corrosion X. The previous owner, Clay, suggested using it over dielectric grease and I can't deny how well it worked on the rear axle adjusters, so I am going to give it a try on the rest of the electrical connectors.
Comentarios