990 Update Part 2
- Chasbo
- May 23, 2020
- 4 min read
Onwards...Although I still can't see the light at the end of the tunnel, but I am making progress on the big dirt bike. Since I am so far behind writing about the rebuild, I am doing this as a stream of consciousness sort of thing. Last time I left off with removing the bikes graphics and perished heat shield material. After I was done with that, I moved onto the fuel pump. The old owner had included a fresh fuel filters for the fuel pump and so I had pulled the pump out of the left hand tank to work on it. Four 10mm bolts held that on. I referred to a rebuild write up I found in the 950/990 Halls of Wisdom, found here: http://www.ktm950.info/ . I did everything in order based on that write up. It was all fairly straight forward stuff. The hardest thing to do was getting everything back together right. Anyhow, I started the job over an oil pan to catch the fuel in the filter. I would rather not have that stuff all over my clothes or workspace.
Ready to go...

First the perished fuel hose came off with my trusty screwdriver
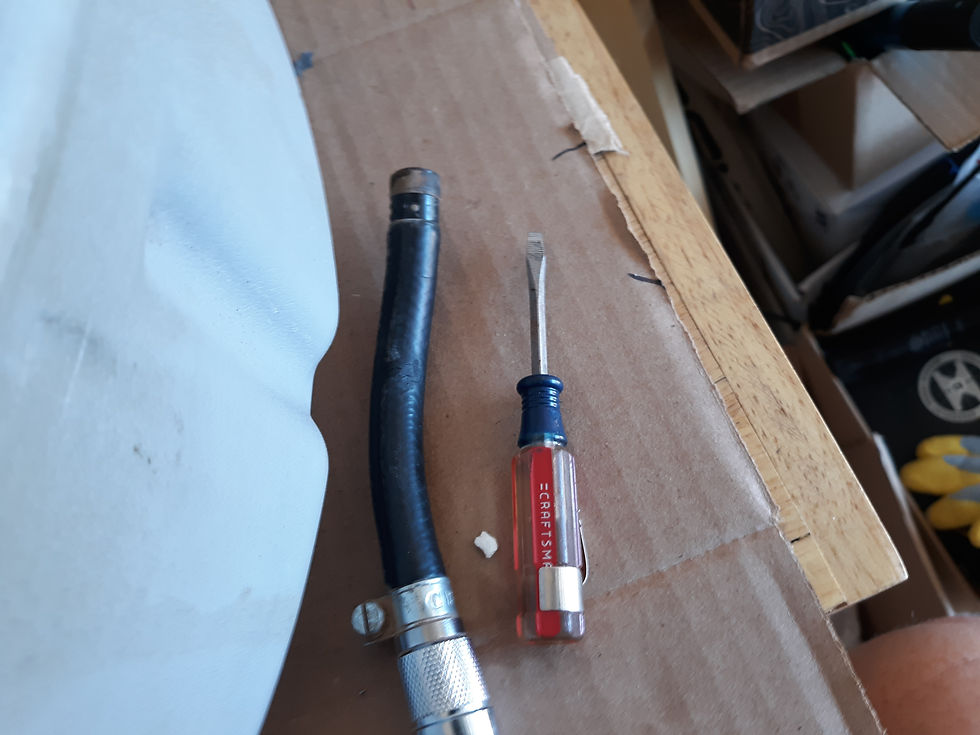
Then the top part of the pump with the first filter comes off by releasing two tabs.


That comes apart super easy to reveal the filter.

Yep, pretty dirty

I put the new filter in and got it back together before moving on.

Then I removed the two phillips screws that held the lower assembly together.

Once removed, it basically fell apart in my hands. One of the wires fell out, its connector was loose, and the old filter fell off the part it pressed on. The inside of the pump body looks like this.

I pulled it completely apart at this point and gave everything a good cleaning.

That connector needed to be pinched a little in order to get it to grab the pin and not fall off again.

I pulled the electrical connection apart and gave it a good cleaning while I was at it as well.


A littlie silicone spray helps with those sticky o rings...


Then the loose wire clipped back in...nice and tight now. Also, I installed new o rings on the pump base.

The old filter did its job at least.

The new filter press fits into place.

Then the whole assembly slides back together. It is a bit of a pain to line it all up right. It took me 20 minutes before I was satisfied.

The top part clips on easy enough at least. All clean and ready to go back into the tank.

I used some isopropyl to clean out the dirt I found inside the tank. I thought it might give the new filters a bit of a break. Then I replaced on of the mismatched screws that hold the pump to the tank with a fresh new one.


Now I just need the new fuel hose....
After that, I moved onto new heat shield on the right hand rear side panel and right hand fuel tank. I got some sheets of material off of e-bay and went at it.
First I created a pattern and transferred it to the material and cut it out.


Then I trimmed it to make it fit better.

Then it was a straight forward peel and stick job. Looks almost factory.

The tank was another matter. It has an extreme compound curve and the material doesn't bend that easily. However, using multiple pieces, I made something I was happy enough with.

It should do the job. Next on the list was fixing a broken panel and reinstalling the rear cylinder exhaust header... One of the screw tabs had broken off, I am assuming in a spectacular crash that Clay had.

Also, the front of the panel had a big crack. Probably from the same crash...

Since you cannot get these panels new any longer, I decided to try and fix this one.
Some JB Weld plastic glue. It promises to fix the problem permanantly. I've glued plastic before and it tends to not work so well, but I decided it wouldn't hurt to try this stuff.

First I cleaned everything off with some isopropyl and then hit the connector first with some of the glue...I had to hold it in place for a couple of minutes. I won't know until reassembly if it worked at all.

Then it was onto the crack. I had a two pronged solution. First I would smear glue in it and then use Gorilla duct tape to secure things while it dried. I'll leave the tape long term since that stuff is super sticky and may help keep the crack from growing.

Then I set the panel aside, since the glue takes 24 hours to cure. Onto the header.... First I cleaned the sensor off with some contact cleaner and reinstalled it in the pipe...


When I removed the pipe, it took some serious moves to get it out of its space. I think I spent 15 minutes playing with it until I figured it out.

When I removed it, I noticed there wasn't an exhaust gasket when I removed it, so I ordered a pair up for both headers and got it installed. I used some antisieze on the exhaust studs. It will likely melt off, but I can say I tried LOL.


I probably should have gotten new nuts, but decided they would work for another few miles. Then I cleaned the sensor connector and hit it with some Corrosion X before putting it together.


That's good enough for right now...I will grab some dinner and a beer and then move onto the next update...Peace
Comments