990 Update/Catch Up Part 3
- Chasbo
- May 24, 2020
- 6 min read
Still a good bit behind here, so please excuse a less than descriptive few posts. Anyhow, I have been motoring along on this project as slow as a snail in winter, and I really want to ride the bike, so I've gotten behind. A few days ago, I got everything I needed to sort the clutch and clutch booster. The night before, I dropped the new clutch fiber plates in some oil to presoak them. I had looked over the job and set all the tools, supplies and parts I needed out so I had nothing to do but focus on the job at hand. The day of the job, I opened the garage and set everything up and got ready to do the job. Now, as a rule I take several pictures of each step of the job I do as I'm going along so that later, when I write a blog post, I have something to show everyone as I ramble on semi lucid about the work I've done. I've noticed though, that the harder the job, the less pictures I take. Makes sense, because I am concentrating so much more on the harder jobs. This time though, the universe added an extra level of difficulty that I wasn't expecting. Due to the recent and ongoing Corona virus reality we all live in, our local schools had all closed down and released their charges into the wilds of their respective neighborhoods. My neighborhood wasn't spared this particular tragedy. There is a 9-10 year old kid, who told me his nickname is the Lizard King that likes to stop by. Normally I am cool with it. After all, I love lizards and my nickname when I was in the Army was Lizard. Given to me by a friend one morning when I had an epic hangover. Anyhow, I love reptiles and usually don't mind some of the tall tales the Lizard King and I like to tell each other, but this day wasn't a good day for that. Just as I got started on the clutch job, the Lizard King rolled up with a captive skink in hand and proceeded to talk my ear off. In between telling me of his recent trip to Komodo Island to catch baby Komodos and asking me when I was going to catch him a Horned lizard, I worked on the clutch. As you can imagine, I didn't take any pictures as I did the job. In fact, I didn't even remember I was going to until I was ready to button everything up. Anyways, the cribs notes of the job would go something like this.... I made sure to oil the clutch booster and inner clutch carrier with oil before I installed them. I used loctite 242 on the fixing nut (the manual says 243, but I didn't have that, so I made due...sue me). I used my brand spanking new Harbor Freight torque wrench to cinch it down to 130ish newton meters (ish, because after all, it is a Harbor Freight tool). Once done, I installed the fiber plates and steels in the proper order, making sure to offset my final fiber plate, just as the manual says, before installing the pressure plate and the new clutch springs from my EBC kit. Then I torqued down the six individual pressure plate bolts to 10 newton meters in a star pattern...once more paying attention to the Austrian engineers that I feel are constantly peering over my shoulder while shaking their collective heads and muttering "tsk, tsk.." at my general stupidity. All of that brings me to here....the nearly finished job.

Then I installed the clutch cover...thusly

After that, I installed a new filter screen o ring

and then tightened everything up. Somewhere along the line, the Lizard King wandered off in search of skinks, horny toads and komodo dragons. I like the kid, but I was not sorry to get some peace and quiet. From there, I moved onto other, greener pastures. Since the right side of the engine was now officially finished, I could finally install the oil tank, cooling system and other assorted parts. Let's start with the cooling system. I had started the job several days before, but screwed it up to keep my screw up streak alive and kicking. I had gotten some new clamps and decided to finish the job. This is the damn clamp that caused such a problem. You absolutely have to have this one installed before moving on. Anyhow, I installed this one first.

Then it was a ten minute job wedging that bastard into the space it had to go. I mean, it was TIGHT. Once in, I made sure everything was super lined up perfect, so perfect I know that somewhere in Austria, an engineer stopped what he was doing and wiped a happy tear from his eye in satisfaction.
Perfection, or an American's version of it.

Once that was on, it was time to attack the new gasket for the water pump cover as well as the hose gaskets.
The old gasket and silicon from the last time this job was done.

The inside of the cover.

A bit of 409 and scotch brite later...

The old o rings and pipe...

Some elbow grease later with the new rings...Silicon spray helped seat them

The water pump cover after cleaning up the gasket surface.

With the new gasket installed and the cover installed. There are new crush washers installed on the drain and bleed screws.

Then the thermostat hose is connected and it was time to move onto the oil tank.

First I installed new rubber mount bushings. the oil tank was pretty shaky as the old bushings had worn a bit.

It took a lot of silicon lube to get the three bushings installed.

Then it was time to get into the install. There is the main inlet hose, two breather hoses and the drain hose with new oil screen and gasket...


That should complete the oil circuit. All I need to do is install the airbox breath hose and add oil at this point....check that job off the list! From there, it was time to finish the cooling system reinstall. All that was left was the radiator, hoses and fans. The radiator needed new bushings as well and it took a couple of different parts houses to get the four I needed. Thankfully, they are easier to install than the oil tank bushings.

There was a bit of finagling to get the wire harness to fit in the space behind the steer tube so that I had the room to install the rad. I got it right after half an hour of trying it several different ways.

The send and return hoses popped right on and after a spritz of Corrosion X, so did the thermostat wire.


A couple of nights before this, I had used some old bicycle tubular glue to repair the foam strip on my radiator fan mount. I knew I save that stuff for a reason. I took off the tape and it held great....sweet....


Then the fan is installed....

Then it was a matter of just removing the radiator (DOH!) to install the fan assembly on it...


The secondary fan which Clay had installed....bonus.

I'll install the overflow later.... In the meantime, I will get the front cylinder exhaust header on.

This is a pretty straight forward thing, but I ended up going back and forth several steps as I realized stuff had to be done before other stuff. In any case, it all went on somehow. You snake the header through with the shield loose to fit it...PRO TIP...install the damn battery box first so you don't have to do this twice like I did.

I used anti seize on the shield bolts.

Notice the missing battery box????

The header gets a new exhaust gasket and anti seize on the studs. Everything is installed loose, just like the rear header to make the rest of the exhaust system install go easier.
Oh yeah...that battery box!

Then the alloy cover that holds the lower tank and skid plate...Then you can reinstall the header pipe.

Then it was onto the collection pipe. This was another of those moments trying to remember the right way to fish the pipe in and how those damn mounts worked....
Missing something here

This looks right-ish....

Ok, that seems right

Basically, it was a giant jigsaw puzzle at this point. I fitted things, pondered the universe in general and then refitted them the right way. Eventually, I managed to get the whole exhaust system installed and tightened down close enough to make me smile. I would go back the next day and triple check everything to make sure it was all right. I suppose more pictures during the disassembly would have helped, but I can figure most shit out given enough time. So clean...scotch brite kicks ass on exhaust stuff

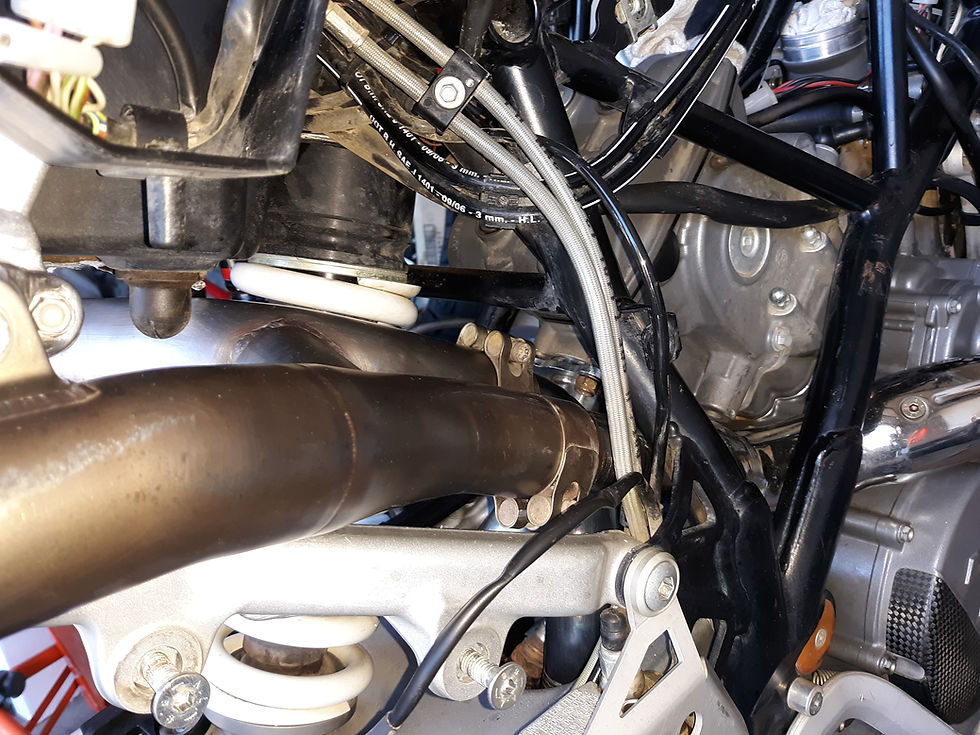

From there, it was onto the rear brake lever and chain protectors.
Hang the spring first

Then attach the brake arm with new hardware that isn't half stripped...KTM bolts are weak.


Looking pretty good.

Then onto the chain guards. Lots of anti seize.


I did a little photo shoot to mark the progress
Oh wait...is that a radiator overflow tank?? How did that get on there??


There is still a ton to do, but this feels like progress at least...Time for a beer...
Comments